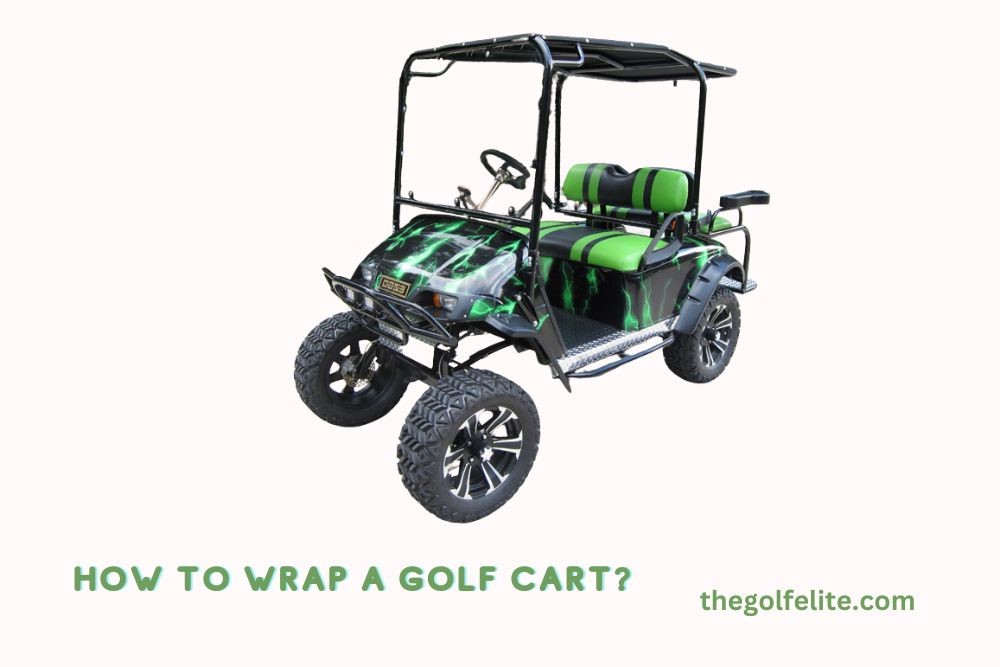
Golf cart wrapping isn’t just about making it look calm; sometimes, it’s for sharing important info, but mostly, it’s about changing the cart’s look without breaking the bank. People love it because it’s like a custom design for you.
Wrapping a golf cart needs some skill – you don’t want air pockets ruining the vibe. The good news is that it’s a skill you can learn. You need to follow some rules and use the suitable materials. Now, golf carts aren’t just for golfing; they’re a style statement.
Wrapping is the way to go if you want your cart to be the coolest one on the block. It’s not just about looks; it protects your cart from scratches and sun damage. Stick around, and we’ll guide you through the wrapping process with tips and tricks for that pro finish!
Advantages of Golf Cart Wrapping
Before we roll up our sleeves, let’s discuss why wrapping your golf cart is a game-changer. Here are some advantages:
● Style Points: Wrapping adds a pop of style to your plain cart. You can go wild with colors and designs, making your cart as unique as you are.
● Protection Armor: The wrap isn’t just for looks; it acts as a shield, protecting your cart from scratches, dings, and the occasional golf ball mishap.
● Easy Peasy Maintenance: Wraps are a breeze to clean. With a quick wipe-down, your cart looks as good as new.
Materials Needed
To wrap a golf cart perfectly, we need some special tools.
These tools include:
● Vinyl Wrap: The star of the show. Choose colors that match your vibe.
● Heat Gun: This nifty tool helps the wrap snugly fit the curves of your cart.
● Film Squeegee: More on this superhero later, but trust me, you’ll want one.
● Measuring Tape: Precision is the name of the game.
● Cutting Blade: For those sharp, clean edges.
Golf Cart Preparation For Wrapping
Now that we have our materials, it’s time to prep our golf cart canvas:
● Clean Machine: Give your cart a good wash. We want a smooth surface for our wrap to stick to.
● No Peeking: Remove any accessories or protruding bits. We want a flat surface to work our magic on.
● Smooth Criminal: Check for any rough spots. Sand them down; we’re aiming for silk, not sandpaper.
Measuring and Cutting the Wrap Material
Getting your golf cart looking sharp is like dressing it up in a custom suit. Imagine you’re a tailor measuring and cutting to ensure it fits perfectly.
1. First, measure each part of your cart, like the hood or side panels, just like you’d measure yourself for a suit. Give yourself extra material in case of mistakes – consider it a safety net.
2. Now comes the cutting part. Use a rotary cutter or knife to trim the wrap material. Follow the lines carefully, like you’re tracing a pattern.
3. Before you stick the material on your cart, line up the cut pieces with each section. It’s like putting together a puzzle – ensure everything fits snugly for a smooth look.
Take your time with this step. Accurate measurements and cuts make the job easier later on.
Applying the Wrap to Your Golf Cart
It’s time to turn your golf cart into a work of art!
● First, carefully peel and stick the wrap section by section, ensuring no bubbles. Then, grab a heat gun to warm up the wrap as you go – it’s like giving your cart a snug second skin.
● Apply the wrap indoors, away from dust. Align it meticulously, using a squeegee to smooth out wrinkles. Move slowly to avoid trapping air bubbles.
● Use the heat gun on tricky spots, like corners or curves, to help the wrap stretch and fit perfectly. Take your time with fenders and mirrors, working on small sections. The heat gun is your friend for shaping, and the squeegee helps banish any creases or bubbles.
Remember, it’s okay to have extra wrap – you can trim it later.
Using the Film Squeegee
When you want to cover a big part of a golf cart with special vinyl, it’s like giving your cart a fancy makeover.
First, cut the vinyl a bit bigger (20% extra) than you need. That way, you’re ready for any surprises. Use masking tape to mark where the vinyl should go and tear a strip in the middle of the backing paper. Stick the exposed vinyl where you kept it, and press it down hard with a friend’s help or using cotton gloves. Smooth out any bumps with a special felt-covered squeegee – it’s like a superhero for getting rid of bubbles!
Use a heat gun to warm things up while sticking the edges of the vinyl. Think of it like giving your golf cart a warm hug. If a heat gun is too much, a hairdryer works, too, just not as hot. And don’t forget to be gentle around tricky parts like knobs and switches.
Time for precision! Grab a razor knife to cut little slits around things that stick out, like knobs and switches. It’s like making a puzzle fit perfectly. Then, use the knife and Squeegee to make everything snug around the curves.
The last touch activates the vinyl’s stickiness with the heat gun. Think of it as making sure your relaxed design stays put. Be careful; that heat gun is like a dragon, so keep your distance!
Now you’ve got a golf cart that’s the envy of the neighborhood, all thanks to the magical powers of Squeegee!
Finishing The Wrapping Process
We are almost done with our awesome golf cart makeover!
● Clean and Smooth: First, trim any extra wrap hanging around and make it look neat – like wrapping the present!
● Check It Out: Take a step back and admire your incredible work. Everything should be tight and flawless.
● Show It Off: It’s time to roll your freshly wrapped cart around the block.
Best Golf Cart Wraps
1. Queenbox 50x152cm Camo Vinyl Wraps

Your golf cart blends seamlessly with the natural beauty of the golf technique. The Queenbox 50x152cm Camo Vinyl Wraps in Woodland Nature Camouflage (Plant 02) bring the enchantment of the outdoors to your vehicle. These wraps are not just stickers; they are a statement, a way to express your love for nature while cruising the fairway.
Key Features:
- Nature’s Embrace: The Woodland Nature Camouflage design mimics the hues of the forest, creating a striking visual impact.
- Easy Peasy Application: Applying these wraps is a breeze thanks to the self-adhesive feature. No need to be a DIY expert; peel, stick, and roll!
- Air Release Technology: The air-release roll ensures a smooth application, leaving your golf cart looking flawless.
Pros:
- Eye-Catching Design
- High Quality
- DIY Friendly
- Durable and Long-Lasting
Cons:
- Size Limitations
2. Queenbox 1.6×6.6ft Camo Vinyl Wraps

For those who prefer a larger canvas for their creative expression, the Queenbox 1.6×6.6ft Camo Vinyl Wraps in Woodland Maple Camouflage (Plant 07) provide ample space to transform your golf cart into a moving masterpiece. Let’s delve into why these wraps are a game-changer.
Key Features:
- Maple Symphony: The Woodland Maple Camouflage design introduces a touch of autumnal elegance to your golf cart.
- Generous Dimensions: With a size of 1.6×6.6ft (50x200cm), these wraps cater to larger carts, ensuring a complete and comprehensive makeover.
- Air Release Roll, Reinvented: The air release technology isn’t just a feature; it’s a game-changer. Say goodbye to imperfections, as these wraps smoothly adhere to the contours of your cart.
Pros:
- Amply Sized
- High Versatile
- Seasonal Charm
- Professional Finish
Cons:
- Application Complexity
Conclusion
Wrapping your golf cart is like giving it a brand-new outfit while protecting it from scratches. All you need is some excellent wrapping material and a little patience. Just follow the steps in this guide, and you can wrap, cut, and apply like a pro. Trust me, it’s easier than it sounds.
Plus, our testing guide to the best golf cart wraps to keep your ride sharp and ready for action. Try Queenbox 1.6×6.6ft Camo Vinyl Wraps if you want stylish Golf wraps.